
Blog
How to Use Facial Kits to Minimize Dark Spots at Home: Practical Playbook with Real Examples

Dark spots—those stubborn little reminders of acne, sun exposure, or just plain life—can feel like an uphill battle. But here’s the good news: you don’t need a pricey dermatologist visit or a shelf full of miracle creams to tackle them. With the right facial kit and a bit of consistency, you can treat dark spots effectively from the comfort of your own bathroom.
I’ve been on my own journey with dark spots over the years—thanks to a mix of hormonal acne and forgetting sunscreen in my twenties (don’t skip SPF, folks). After trying a million serums and masks, I landed on facial kits as one of the most practical solutions. Let’s talk about how they work, which steps matter most, and how you can actually see results without throwing money down the drain.
—
Why Facial Kits Are Great for Dark Spots
Facial kits are like skincare “cheat sheets.” Instead of piecing together random products that may or may not work together, these kits are pre-packaged with everything you need for a complete treatment session. Most include cleansing agents, exfoliators, serums or gels with active ingredients (like Vitamin C or niacinamide), and finishing creams that lock in moisture.
The beauty here is simplicity. You’re not playing chemist with your skincare routine; it’s all laid out step by step. Plus, if you’ve ever felt overwhelmed by endless product options at drugstores or online shops (raises hand), facial kits eliminate that decision fatigue entirely.
That said, not all kits are created equal—some cater specifically to brightening skin tone and fading pigmentation while others focus on general hydration or anti-aging benefits. Always look for terms like “brightening,” “dark spot correction,” or “even skin tone” when shopping around.
—
Step-by-Step: Using Facial Kits to Target Dark Spots
Let’s get down to it: how do you actually use these kits for noticeable results? Here’s the playbook:
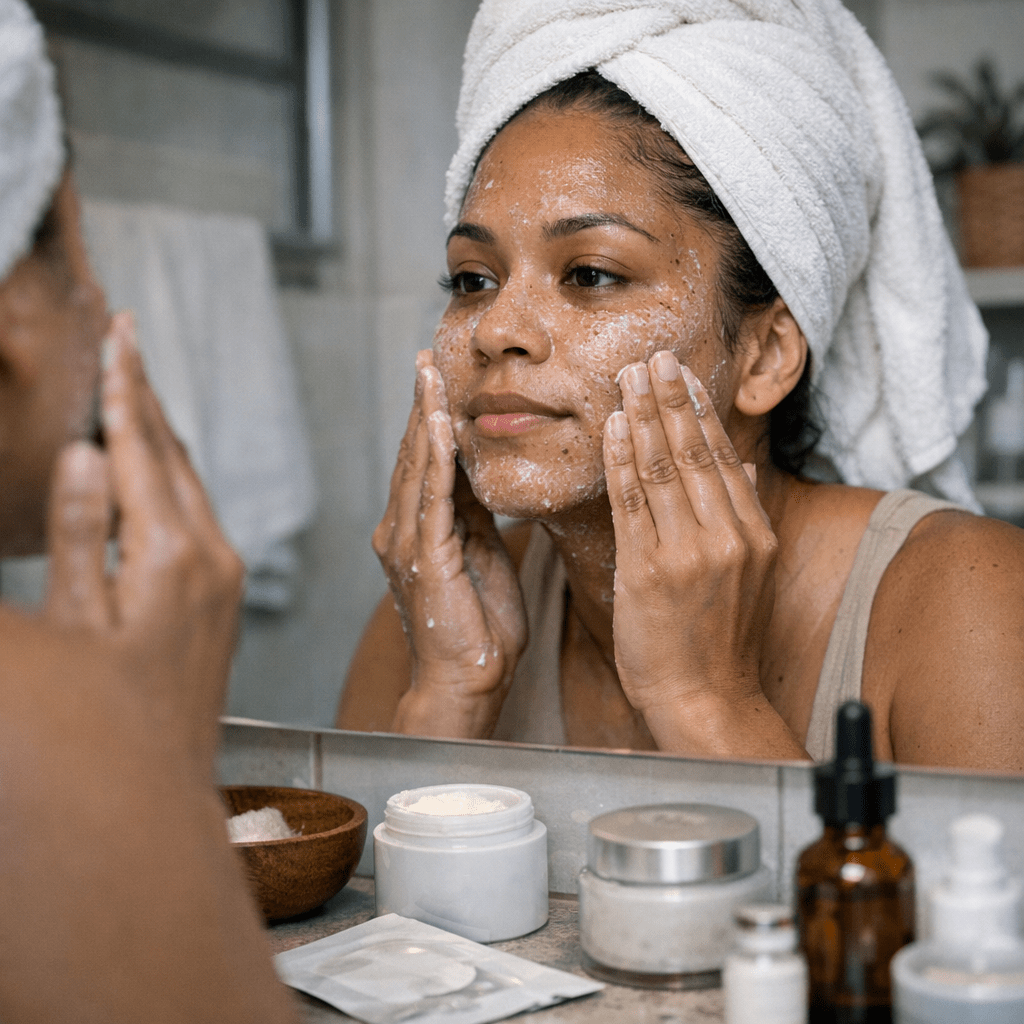
1. Start With Clean Skin
This might seem obvious, but don’t skip this step—or rush through it! Use a gentle cleanser that removes dirt and oil without stripping your skin dry. If you have oily skin (like me), I swear by gel-based cleansers because they leave my face feeling fresh but not tight. For some great options under $25 that pair well with facial kits, check out this list of cleansers.
Double cleansing can also be helpful here if you wear makeup daily—start with a micellar water or cleansing balm before moving on to your regular face wash.
15 Best Polishes and Scrubs for Blackhead Removal Under $20: Practical Playbook
—
2. Exfoliate Gently
This step is crucial for fading dark spots because exfoliation helps remove dead skin cells that dull your complexion and make pigmentation look worse than it is. Most facial kits include either a physical scrub or a chemical exfoliant (like glycolic acid). If you’re new to acids, go slow—overdoing it will only irritate your skin and possibly worsen discoloration.
Pro tip: Perform this step at night if possible since exfoliation increases sensitivity to sunlight.
For winter months when dry patches creep up out of nowhere, I recommend pairing your kit’s exfoliant with one from this guide on best exfoliating scrubs.
—
3. Apply Active Ingredients
Here’s where the magic happens! This is typically the serum/gel step in your facial kit—the part loaded with ingredients designed to target dark spots directly.
- Vitamin C: A powerhouse antioxidant that brightens skin tone over time.
- Niacinamide: Works wonders for reducing redness and uneven pigmentation.
- AHAs/BHAs: Exfoliate deeper layers of skin to speed up cell turnover.
- Licorice Extract: A natural brightener often overlooked but extremely effective.
Take note: Not every kit includes all these actives—and some might even combine them—but pay attention to what works best for your skin type over time.
—
4. Massage It In (Don’t Skip!)
One thing many people overlook? The actual massaging process during application! Don’t just slap on products and move on; give yourself two minutes to really work them into your skin using upward circular motions. This boosts blood circulation and ensures better absorption of those fancy actives we just talked about.
10 Best Hydrating Cleansers for Dry Skin Under $30: Practical Playbook with Real
—
5. Seal Everything With Moisture
Most facial kits end with either a moisturizer or sleeping mask designed to replenish hydration post-treatment—and trust me when I say this is non-negotiable! Even oily-skinned folks like me benefit from locking in moisture after applying treatments heavy in actives like AHAs or Vitamin C.
If you’re using these treatments during daytime hours instead of nighttime sessions? Don’t forget sunscreen afterward—it’s truly the most important product when trying to fade dark spots long-term!
—
Real Talk: Can You Expect Instant Results?
Here’s where we set expectations straight—you won’t wake up tomorrow morning with flawless skin after one use (sorry!). Fading dark spots takes time because hyperpigmentation forms deep within multiple layers of tissue beneath visible surface layers—they didn’t show up overnight either!
But here’s what is realistic:
- After 2–3 weeks: Increased brightness & smoother texture across treated areas.
- After ~6 weeks (with consistent weekly usage): Fewer noticeable patches overall & more even tone developing visibly.
I’ve personally seen improvements sneak up unexpectedly after sticking religiously around week four—it’s subtle progress day-to-day until suddenly clearer reflections greet mornings again mid-step routine somewhere accidentally catching mirrors brushing teeth moments naturally happening twice unnoticed less frequently reminders bother self-confidence anymore finally forgotten worries altogether eventually replaced healthier glows regularly observed indirectly validated compliments received externally validating internally motivated keep going momentum builds organically confidence renewed brighter faces greet world unapologetically rejuvenated…
Related Links